Tutorial: Lighter Than Air Peasant Top
 It's still really warm here. It is, after all, early August in North Carolina, and I'm not complaining; if I wanted cool weather, I'd live in a different part of the country. But my mind has been wandering more frequently to the quickly-approaching end of summer, when I'll go back to school and will have to wear more subdued, school-appropriate clothing, and fewer strappy dresses and summery frocks. Determined, however, that "professional" doesn't have to mean "boring," I wanted to come up with something that I could wear now (when it's hot and I'm more casual) and then (when it's cooler and I have to look more..with-it). So I came up with The Lighter Than Air Peasant Top.
It's made from an upcycled t-shirt, so it's cheap, eco-friendly, and comfortable. Plus, the options are endless, which means you can make it all yours. Here's how you do it!
Materials Needed:
- upcycled man's t-shirt (I used a size L)
- 1/4" elastic, in a length to be determined (I used about 29", which let the top have a gather of about 1/2 of the original shirt size when all was said and done)
- safety pin
- coordinating thread
- sewing machine
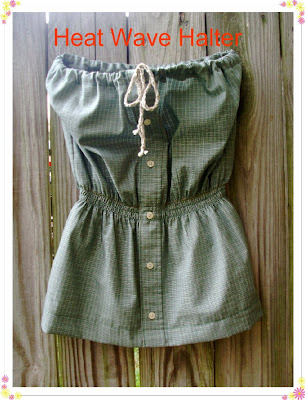
Just like with the Heat Wave Halter, I've given instructions for optional or alternative steps, so you can pick and choose to make the kind of shirt that's ideal for you, based on your preferences and the amount of time you have to spend on the project.
What to do:Step 1:
 Start with a t-shirt that's about 2 sizes too big for you.
Tip: This would even work with a printed t-shirt, so it's a great project to give new life to one of your husband's old tees...as long as you love it and it's not really gross from yard work and other Manly Responsibilities, as most of my husband's are. If you don't have a shirt big enough to use, it's time to hit the thrift store, where the selection is huge. Huge. A long-sleeved shirt would make a great alternative for cooler, winter weather; you could make 3/4-length sleeves.
Step 2:

With chalk (you can kind of see the light-purple chalk line in the picture above), draw a chalk arc right below the neck of your shirt, extending about 2"-3" down on the shoulder on each side. Cut off this top part.
Step 3:
 Cut off the edges of the sleeves, right inside of the existing stitching lines. Do the same thing on the bottom hem of the shirt, being sure that you DON'T cut into the stitching, especially on the bottom tube. Set these aside, as you'll use them later.
When you're through with these steps, your shirt will look like this:

Step 4:
 Cut a vertical 3-inch slit at the top of the neckline of your shirt. We'll work more on this later.
Step 5:

This next step is fun. It's magic, like shirring ;-). On the hem, sleeves, and collar, which are all cut, raw edges now after you sliced them off, you're going to make them into lettuce edges. Basically you're going to make them a little ruffly and finish them at the same time. So set your machine for a normal zig zag stitch, normal stitch length and width with regular tension, stretch the fabric gently as you feed it through the machine. When the needle comes down on the left, it will land on the fabric, and when it comes down on the right, it will land just off of the fabric. Do this on all of those edges. When you're done, the edges will be a little ruffly (bonus: when you wash your shirt, those edges will be less likely to roll). Be sure not to sew over that slit in the front. We want that little gap for later.
Step 6:

Take what was once the waistband, which you cut off earlier. Cut open the loop, so it is now one long piece of fabric (but don't cut through those existing stitches that actually make it a long tube of fabric). Iron it so that the raw edge (the edge that you cut) is on the bottom, and you have a smooth tube on top. It's hard to see in the picture, but basically you'll have a smooth casing, with the sewn/cut edge ironed on the bottom.
Step 7:
 Stretch this tube gently so that it fits all the way around the neckline of your shirt, and pin it down on the outside of the shirt, about 1/2" from your newly-ruffled top edge of your shirt.
 Edge stitch down both sides of your tube to attach it to your shirt. This will be the casing for your elastic.
Step 8:

Using a safety pin, thread your elastic through this casing. My elastic was about 29" long, or the width of the front of my shirt from shoulder to shoulder. This was a great length for me and it gathered the shirt just enough, but you might want to play around with the measurement to get a length you like. Sew each end of the elastic down at the edge of the slit you cut in step 4.
Tip: don't let it slip all the way through the casing, or you'll lose the ends of the elastic and have to fish for it with a safety pin and you'll poke yourself and get blood all over your newly-created shirt. Not that I know anything about that. Or that I did that here. But it could happen.
Step 9:
 Take the arm bands that you cut off and cut off the stitching line. Cut open the tube so you have one longer piece of fabric, stretch it gently, and tie a small knot close to the end of each of them.
Step 10:

Using a zig zag stitch, sew one of these strips to each side of that slit in the front, just under (or just in or even on top of, if you don't have room otherwise) the casing. They will be ties for the front of the shirt.
You're done!
 You might want to adjust the length when you're done. If you do, just cut off the shirt and re-ruffle it, the way you did in step 5.
Another one done!
Comments
Happy Met Monday!
xoxo laurie@heavens-walk
http://sewing.craftgossip.com/tutorial-make-a-peasant-shirt-from-a-t-shirt/2010/08/03/
--Anne
Janet xox
Jennifer
Stupid serger !
Mais j'essaierai plus tard.
Merci pour le tutorial.
Thanks -
My best Diane
I have a somewhat similar tutorial for a peasant top, but without the casing and ties -- which are FANTASTIC!
Can't wait to try yours!
http://perrilyncreations.blogspot.com/2010/08/big-sister-shirt-in-makingthanks-to.html
Now I want to do some for myself!
Jennifer
Mine fit a bit snugger around the shoulders than I like so I'll give it to my teen daughter and make another for myself out of a shirt one size bigger.
Really love it though! Thanks!
Thank you for your comments, too - I love reading them, and it feels good to know I'm not writing into a void on the Internet ;-).
Have a great weekend!
Funny Shirts
http://re-groovenate.blogspot.ca/
thank you for teaching!
I don't know why you couldn't. I've never done it (I don't usually have the patience for hand sewing), but I can't think of anything that would be done differently. Let me know how it turns out if you do it!
Greetings from Germany :-)
Rosalie
Thanks so much for your great blog! Love it!!
Ms T
Thank you for the tutorial!
peace,
CheyAnne
~Michelle
Growthwonders delivers result-oriented SEO services for startups and established businesses. Our services include website audits, content optimization, link building, and performance tracking. We focus on increasing organic traffic and search engine rankings. Our experienced team uses ethical techniques for long-term growth. Choose Growthwonders SEO services to strengthen your online presence effectively.