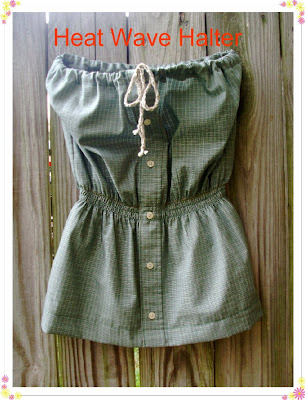
Scooby Doo, You're Red, White & Blue: Summer Halter Tutorial
Yes, kids are always watching. And listening. She sees me cutting, sewing, reconstructing, and she thinks, "This is just what people do." I couldn't be more proud.
We came home from the store, and I got to work immediately. Not only did I want to make her a dress, but her enthusiasm inspired me to do what I've been meaning to do for a while: write my first tutorial. So without any delay, I began cutting and photographing and sewing, and within an hour (I'm not kidding), I had finished her dress:
It was so easy to do, and I LOVE it. She's worn it three times within a week, so I know she loves it, too. Easy, inexpensive, upcycled, and adored. Doesn't get better than that! Here's how to make your own:
Materials:
t-shirt (I used a size L to make a dress that fit my fairly tall 6-year-old)
scissors
needle, thread
Directions:
1. Start with an upcycled man's shirt.
The thrift store was having a 50%-off sale last week on clothes (my husband swears I'm the only person in the world who gets excited by sales at thrift stores, but I know that's not true. You can all attest to that). I couldn't believe it when we found this one, since Kate loves Scooby Doo AND this one had a patriotic theme, which was perfect for July 4th. The shirt was regularly $3.50, so we got it for $1.75.
2. Do some eyeball measuring (my preferred method) or use a tape measure to determine the desired length. You will be using the length of the shirt, from right under the collar band. For Kate, the length from right under this band to the hem was one inch longer than we needed, which was actually the perfect length, since you'll need exactly one inch to create the casing for the straps at the top (more on that later). If your shirt is too long, you can cut it at the bottom and either re-hem it, which is a snap, or leave a raw edge, since jersey won't fray (I love the raw-edge look on jersey, but if you don't, just hem). You could also choose a smaller size shirt to avoid cutting or hemming for length.
3. You'll be cutting a trapezoid shape (thanks, otherwise-long-forgotten geometry class) to make the dress. To cut mine, I made a three-inch mark in from the bottom of the sleeve, as shown below.
4. From the bottom corner of the t-shirt, use a straight edge to make a line up to the top of your shirt, making sure your straight line goes right through the little chalk mark you made.

6. Using your straight edge along the top, right under the collar band, from one side to the other.
7. Since you've cut through both layers of the shirt for all of these steps, you will have two identical trapezoids, which are the front and back of your dress.
Believe it or not, you're through the most difficult part of your dress! From here on out, it's simple assembly. I used a serger for the decorative edges, but since this is purely decorative on jersey, you can skip the serging instructions and just sew your dress together. Since I'm still in love with my serger and find any excuse I can to use it, I did so here. Plus, the edges really do look nice when they're serged (and tend to roll less). Let's keep going...
8. If desired, serge down the outer edge, from the top of the dress to the chalk X you made to mark where the sleeve opening will be. This will make a nice edge for what will be the armhole of the dress. Do this a total of four times (one on each side of the front piece, one on each side of the back piece). I also serged across the top of each piece, although this is also optional.
9. Fold the top edge of each piece down one inch. Pin and sew straight across on your machine (make sure you use a ball point needle for knits). This will become the casing for your tie.
10. Place the front and back pieces together, right sides facing, and on your machine or serger sew down each side from the BOTTOM of each armhole (which you marked with an X and possibly serged). Don't sew closed the armhole ;-).
12. Cut two strips of jersey from another shirt, or raid your scrap basket. My strips were 2" by 21" and cut from the top of a shirt from my scrap bag. Stretch the strips (don't be afraid to tug that jersey!) so they're about twice the length of when you started.
13. Using a safety pin, thread one strap through the casing on the front, and one through the casing on the back.
14. Tie the straps together at the shoulders, and you're done!
Easy-peasy, and fun to wear!
Variations:
- This could be almost an entirely no-sew project; just use a more fitted shirt so you don't have to cut and re-sew the side seams, use small scissors to snip small slits at the top to weave through the drawstring through the fabric instead of making the casing, and you have a dress!
- Make it shorter and make a summer top for yourself.
Happy heat wave!


Comments
Thanks for linking!
Leisel
Brown Paper Packages
http://bogogreenio.blogspot.com/2012/04/look-what-i-got.html
I like your tutorials! I am french and do not worry, we all love as much as you do buying old tissus and clothes to make new ones. I do not understand all your text, but thanks to your photos, it helps me a lot. Thank you for all that. Stéphanie from France