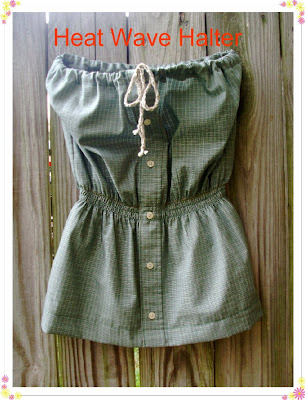
Tutorial: Heat Wave Halter
I was inspired by this tunic, from Forever 21:
My version is made from an upcycled man's shirt - readily available from any thrift store, or even from your favorite guy's closet - and is customizable with myriad options, so you can make exactly the kind of shirt that's right for you.
Materials Needed:
- upcycled man's shirt (short-sleeved is fine...I used a size XL.) Note: this size fit me perfectly when I was done, and I have a small frame. If you think you might need a larger size when you're done, start with a 2XL or 3XL. There are plenty of those out there, too, and it's better to guestimate on the larger side from the get go, rather than go through all of your steps and find out that your final product is too small)
- 1/4" elastic, in a length 3" smaller than your upper bust measurement (the measurement right above your breasts, almost around your torso under your underarms, where a halter top would rest)
- cording, long t-shirt scrap or crocheted chain, to use as a tie
- safety pin
- coordinating thread
- elastic thread
- sewing machine
- serger (optional, but nice)
When possible, I've given instructions for optional or alternative steps, so you can pick and choose to make the kind of shirt that's ideal for you, based on your preferences and the amount of time you have to spend on the project.
Step 1:
Start with your average, garden-variety discarded (or soon-to-be-discarded, if your boyfriend doesn't yet realize that you took it from his closet) shirt. Feel good that you're creating something new and functional and trendy from something that is otherwise unloved and would be unworn. Pat yourself on the back, and keep on keepin' on.
Optional: Regular fabric, in a width that is a comfortable circumference of your upper bust (plus about 5") and the length from your underarms to your desired shirt length (plus hem) is fine, too. Example: if your upper bust measures 35 inches around, make sure you have two 20" wide pieces of material.
Step 2:
Using a seam ripper, take off the breast pocket, if there is one. If you want, you can take time to admire the Silly Bandz on my wrist. They're from my kids and have been on my wrist all summer.
Also, take your time and don't tug too much at the material during this step, or you'll create a hole, like I did (you'll see it later, if you look hard). If you do make a hole, it's fine; you can just take a few stitches to mend the hole, and no one will be the wiser because the top of the final shirt will have a little gathering and blousing to camouflage the mended hole, but it's easier to not make a hole to begin with. Lesson learned.
Optional: Leave the pocket on, as is. Or if you're worried about it sagging on the finished shirt, leave it on but sew the top of the pocket shut.
Step 3:
Chalk marks might help you with this (like in the picture above), but they're not absolutely necessary. Cut off the bottom of the shirt, right above the curved hem; cut the top, right below the collar (about 1" above that second button); cut the sides right inside the arms. Cut through both layers of the shirt. When you're done, you will have two layers of this:
Note: the back of your shirt might have a pleat right in the middle, like mine did, as part of its pre-transformation construction. This is fine; just treat it like it's not there, and keep going. It actually adds a nice little bit of extra room in the back, which is nice .
Step 4:
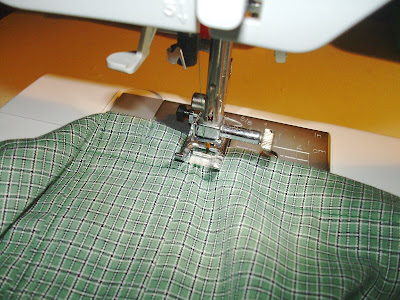
Sew the front shut, right down the edge of the botton holes. You could use a zipper foot for this, if you're worried about your presser foot hitting the buttons, but my regular foot worked fine. Which is a good thing, since I didn't want to change my presser foot. Because of feeling lazy.
Optional: You could skip this step entirely. The buttons will still be there to hold it shut, and it won't fly open. I just think it looks nicer with everything sewn down.
Step 5:
Right sides together, sew the front and the back of the shirt together at the side seams. Use a serger or a sewing machine. If you're using a sewing machine, you can zig zag the edges, use pinking shears, or leave them raw.
Step 6:
Serge the top and bottom edges (don't sew them together, just finish the edges).
Your tube of fabric should now look something like this, open at the top and the bottom:
Optional: You could skip the serging if you don't have a serger. You can zig zag the edges on your machine, pink them, or leave them raw.
Step 7:
Cut off the very top button. IMPORTANT: After you remove the button, use an Exact-O knife or a sharp pair of small scissors to go through the button hole and cut through the layer of fabric right behind the button hole. You should have a "button hole" that goes all the way through both layers of fabric (the original button hole, and the one you just cut behind it, parallel to it, in the other layer of fabric). This is going to be important when you insert the elastic later on, since we'll be using the button hole as an opening for the elastic and the tie. It will make sense later, I promise. This is just a small slit (less than 1/2"), and I do not worry about fray. It will be covered, anyway, as it will be well behind the tie.
Step 8:
Fold down the top edge, right above the now-buttonless button hole. Iron and sew this hem. The fabric should come to rest below the button hole, so you can sew it down and still have access to the button hole:
Step 9:
Using a safety pin, thread your elastic through the button hole and through the casing you made.
Sew each end of the elastic on the side of the column of buttons (one edge of the elastic on each side of that 1" or so strip that is the button strip). The elastic will not overlap; in fact, you will have a gap of approximately 1", right where the button strip is.
Tip: make sure you catch that first end of the elastic and sew it down before it scooches through the casing and you have to dig around for it. That's never any fun. Sew down the one end, finish threading the rest through, and sew down the other edge on the other side of the button strip. I used a zig-zag stitch.
Step 10:
Thread your cording or other tie through the button hole in this same casing, right over the elastic. Bring the other end back out through that same button hole.
Optional: I crocheted a chain from all-cotton thread and used it; you could also use a 3/4"-wide scrap of long t-shirt material, stretched to the length you need to go around your chest. Use what you have! Be creative!
Step 11:
Try on the shirt. With chalk, mark your waist. You are going to make 3 or 4 lines of stitching (the line you drew, plus 2 or 3 lines right below it), using elastic thread in your bobbin, to cinch the waist. Make your lines about 1/2" apart. You may want to chalk out your lines before you start sewing, to make sure you don't come across a button when you get to the front. DON'T SEW OVER A BUTTON OR YOU'LL BREAK YOUR NEEDLE! Worst-case scenario, just go AROUND the button (top or bottom, it doesn't matter) and keep on sewing.
Shirring, or sewing with elastic thread, is EASY! You can find a great tutorial on the Ruffles and Stuff blog. Once you try it, you'll be hooked.
Optional: You can add some simple straps, made from the scraps you cut off in step three, if you'd like a more covered look or are worried about it falling down. But I've worn mine all day and have had no problems at all.
Step 12:
Hem the bottom. I used a 1 1/2" inch hem, to add a little weight to the bottom, but try on your shirt and hem it at your desired length.
You're done! Put it on. Tie the top. Eat a popsicle. Show the heat who's boss.


Comments
Would you mind if I linked this project in my tumblog? It can be located at <a href="http://www.sewcrazy.tumblr.com>sewcrazy.tumblr.com</a>
Thanks again for reading!
Michelle
Visiting from justsewsassy.com
rubies-pearls.blogspot.com
Stopping by from Get Your Craft on Tuesday to check out your entry & say hi!
(But may I just point out - you twitched my pet peeve: "without further adieu"... should actually be "ado", which means "fuss". "Adieu" is French for "farewell.")
www.blackberryvine.blogspot.com
smiles!
Thanks for linking!
Leisel
Brown Paper Packages
I have all these women's business shirts - standard, long-sleeve, collared shirts - but I've recently shifted to a new industry/job in which I can wear funkier (less corporate) clothing. I don't want my 10-or-so collared business shirts to go to waste. I'm hoping to "style" them up somehow.
Would LOVE any ideas or links... thanks!